Adding multiple clients
If you’re going to use Sage Business Cloud Accounting, Payroll, or Start for a client, you’ll need a licence to allocate to that client.
You can add multiple clients in one batch. This requires filling details into a spreadsheet and uploading to Accounting Partner Edition.
Fill in the spreadsheet
- From the client list, select Quick Actions
 then Multiple Client Import.
 - Select the .CSV template link. This will start the download of the spreadsheet you’ll enter your data into.
- Once the spreadsheet has downloaded, open it. How you do this may differ depending on what browser you’re using. The spreadsheet will work with common spreadsheet programs including Microsoft Excel.
- Complete a row for each client you want to add.
- Save the file with a memorable filename to a location you’ll remember (perhaps your desktop).
Upload the spreadsheet
- From the client list, select Quick Actions then Multiple Client Import.
- Select Upload my CSV.
- Find the spreadsheet you saved earlier, then select Open.
- We’ll show you the clients pending import. You can tweak the import by clicking in cells and making changes.
- Select Save and we’ll add your clients.
You’ll find your clients on the Imported Clients tab of the client list. They’ll stay here until you add subscriptions.
Adding subscriptions
You can add subscriptions for up to 50 imported clients at a time. These need to be subscriptions to the same applications.
If you’ve a client with multiple businesses and they require log in details for each business, see For participating clients below.
If you’ve a client with multiple businesses and they don’t require log in details for their businesses, see For non-participating clients below.
Add subscriptions
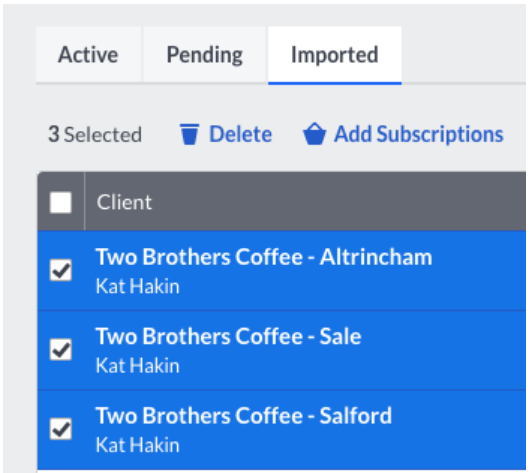
- From the client list, select the Imported tab.
- Select the clients to add subscriptions to.
- Select Add Subscriptions.
- Choose who is paying.
-
Choose who can log in.
If you select My Company, the subscriptions are immediately activated. You’ll be able to grant access to a client at a later date. See Working with subscriptions.
If you select Both of us, we’ll send activation emails to your clients. These clients will move to your Pending tab until your client follows the instructions in the activation email.
- Select the subscriptions to add.
- Select Save.
Adding Accounting subscriptions to clients with multiple businesses
You can import multiple client records with the same email address. You may want to do this if:
- You have a client with multiple businesses who needs to access Accounting for each of those businesses. We refer to these as participating clients.
- You have a client with multiple businesses and you’re going to manage these businesses in Partner Edition without providing log in details to the client. We refer to these as non-participating clients.
When you have a multi-business client, you must provide access to either all those businesses or none of them. It’s not possible to only provide client access to some of those businesses.
For participating clients
These are clients who will have their own log in details for Accounting.
Follow the steps above in Fill in the spreadsheet and Upload the spreadsheet making sure to use a separate row for each of the client’s businesses but also to use the same email address for each of them.
- From the client list, select the Imported tab.
-
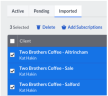
Select the client’s businesses by clicking the check box on each row.
- Select Add Subscriptions.
- Choose who is paying.
- For Who can log in? choose Both of us.
- Select Accounting.
- Select Save.
Over to your client…
Once you’ve selected Save:
- We email an activation link to your client.
- They click the link in the email and set a password.
- We’ll move your client to the Active tab and you’ll be able to access their data for this first business.
Over to you…
- On the Pending tab, find the client’s remaining businesses.
-
For each business, under the Activation Status column, select the Awaiting Client Activation
 arrow.
We’ll email additional activation links for each client business. Your client should click the links in the emails and log in using the details they’ve already set up.
You’ll have each business on a separate row in the client list on the Active tab.
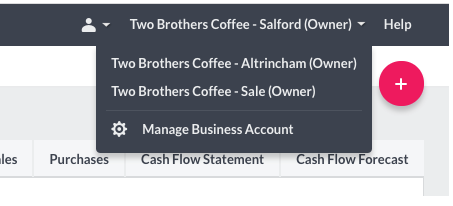
Your client will be able to switch between their businesses from the business switch menu when they’ve logged into Sage Business Cloud Accounting.
For non-participating clients
These are clients who won’t have their own log in details for Accounting.
Follow the steps above in Fill in the spreadsheet and Upload the spreadsheet adding a single row for the first non-participating client.
- From the client list, select the Imported tab.
- Select the client’s business by clicking the check box on the client’s row.
- Select Add Subscriptions.
- For Who is paying? choose My Company.
- For Who can log in? choose My Company.
- Select Accounting.
-
Select Save.
The subscription will appear on the Active tab.

- Click this client to open the client sidebar.
- Select Manage.
- Select Edit contact info.
- Copy the email address displayed in the Email field.
- In the CSV file you used for the initial import, complete additional rows for each additional business. Make sure to use the email address you’ve copied.
- Save the CSV file.
- Select Quick Actions then Multiple Client Import.
- Select Upload my CSV.
- Find the spreadsheet you saved earlier, then select Open.
- We’ll show you the clients pending import. You can tweak the import by clicking in cells and making changes.
- Select Save and we’ll add your clients.
-
From the client list, select the Imported tab.
- Select the client’s businesses by clicking the check box on each row.
- Select Add Subscriptions.
- For Who is paying? we’ve pre-selected My Company.
- For Who can log in? we’ve pre-selected My Company.
- Select Accounting.
- Select Save.
You’ll have each business on a separate row in the client list on the Active tab.
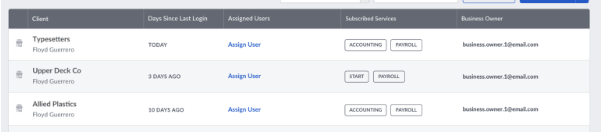
You can sort these multi-business clients either by searching by the email address or sorting on the Business Owner column.