Managing clients
Use Accounting Partner Edition to view and manage your client’s data remotely. Invite clients to an Accounting or Payroll service, or accept invites from existing Sage customers and then access their data in one click. This is a great way to collaborate with your clients online. Some of the things you might want to do include submitting VAT returns, using reporting tools, creating journals, and customising your client’s chart of accounts.
When you first create your clients, you can choose whether the client is to pay for their Accounting or Payroll service directly, or whether you want to pay for the service on their behalf.
Add clients
Adding clients is simple. See Add Clients to learn how. It is now possible for you to add clients with more than one business (who can then access all connected businesses using a single login).
Open a client
When you sign in to Accounting Partner Edition, the first thing you see is the client list.
You start working on a client by clicking their name in the client list.
The Client Sidebar appears. You can close the Client Sidebar by clicking the cross at the top-right.
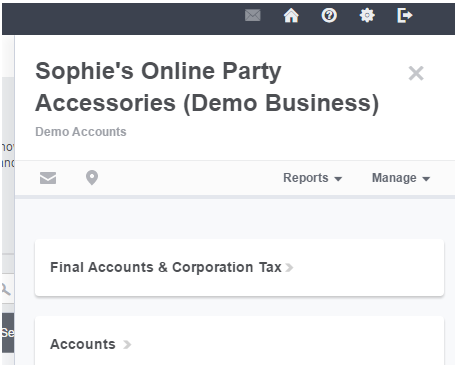
There’s lots you can do from the Client Sidebar, including:
- Accessing a service like Accounting, just by clicking the service name in the sidebar.
- Running reports by clicking Reports and choosing from the list.
- Accessing Compliance services – Final Accounts and Corporation Tax.
To remove a client
If your client originally invited you to access their Sage data, there are circumstances where they might need to revoke that access. For example, if they’re changing accountant.
Removing a client cancels the licence and the following changes occur:
- The licence becomes client paying, chargeable at full RRP. This cannot be reverted to accountant paying, nor any discounts reapplied.
- If your client still requires access, make sure you've entered their email address in their client details. For a participating client (one that has their own login details, do this by clicking a client, then from the client sidebar choosing Manage, then Edit Client Details. For non-participating clients, follow the instructions in Grant your client access so they can sign in themselves below. Once you stop managing them, they'll be notified and have access to their data for 30 days. They'll be prompted to enter their payment details for continued access.
- Any commission you receive for this client licence will cease.
- Find the client to remove on the Active tab.
- Select the client by clicking its row.
- From the client sidebar, select Manage, then Stop Managing This Client.
-
Select Yes to confirm.
If you've been using compliance services with this client like Sage Final Accounts, that data will still be available via the Sage Partner Edition client list. To completely remove this client from Sage Partner Edition, you'll need to delete all their data and submissions from within the compliance service before choosing Stop Managing This Client again in Sage Partner Edition.
Once you’ve stopped managing this client, a message is sent to your client’s service to advise them of the change. If you originally invited the client and are currently being billed for their services, your next direct debit is amended accordingly. Your client can then log in to their data as normal but is prompted to enter their direct debit details. Your client will then start to receive their own Sage invoices for the relevant services.
- Find the client to remove on the Pending or Imported tab.
- Select the client by clicking its row.
- From the client sidebar, select Manage, then Delete Client.
- Select Yes to confirm.
Remove your client’s access to their data
If you’ve previously invited clients (and are paying on their behalf) you can remove their access. Removing access for a client means that they can’t access Sage at all. When they attempt to log in they will receive a message stating that you have removed their access and that they must contact you to resolve the situation.
If you remove a client’s access to Sage, as the accountant you can still log in at any time to post new transactions or edit existing transactions as you would normally. This only removes your client’s access and you will still pay for the service as normal.
To remove a client’s access
- Client list > click the client you want to change access for.
- Click Manage > Disable > Yes.
To reinstate the client’s access
- Client list > click the client you want to change access for.
- Click Enable > Yes.
Add or remove services to a client
To add new Accounting or Payroll services to a client that currently has no Sage Business Cloud services, please refer to Add Clients.
You can add or remove the services your clients have access to, through Accounting Partner Edition.
You can only do this for clients whose Accounting or Payroll subscription you already pay for. If a client pays for their own subscription, you can’t add or remove services for that client.
If your client is in the Active Clients list:
- Click the client > from the Client Sidebar, click Manage Subscriptions.
- Select the service you want to subscribe your client to > Subscribe.
- Continue > check the information is correct > Finish.
To remove a service
- Client list > click the required client.
- Manage Subscriptions > select the service you want to remove > Remove.
- Continue > check the information is correct > Finish.
The next time the client logs in, this service no longer appears and your next monthly invoice is amended accordingly.
Change who’s paying the subscription
When you first create your clients, you can choose whether the client is to pay for their service directly, or whether you want to pay for the service on their behalf. Once you add a service to your client, you can’t change this, even if your client hasn’t yet activated their account.
Pending clients
Clients that you invite to use Accounting, Payroll or both appear in your client list in the Pending tab.
If you don’t want to work with the client using Accounting Partner Edition, you can remove them. Also if you’ve invited the client, but didn’t have the correct email address, you can remove them then send a new invite to the correct email address.
To remove a pending client:
- Client list > Pending tab > click the client to open the Client Sidebar.
- Mange > Delete Client > Yes.
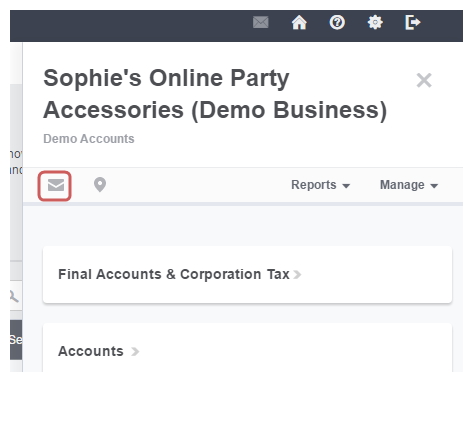
Send a message to your client
- Client list > click the client.
- Under their name at the top of the Client Sidebar, click the envelope icon to open a new email to your client. This will open in whatever you’ve set your default email program to be.
Send a message to your client
- Client list > click the client.
- Under their name at the top of the Client Sidebar, click the envelope icon to open a new email to your client. This will open in whatever you’ve set your default email program to be.
Grant your client access so they can sign in themselves
It’s possible that some of your clients don’t have email addresses added. This is a deliberate aspect of Accounting Partner Edition whereby you have access to the Accounting or Payroll data for these clients, but the clients themselves don’t. We refer to these clients as non-participating. You’re still able to work with this data as normal, but the clients themselves don’t get notifications and don’t have access to their data.
If this situation changes, and you want them to be able to sign in and have access to their accounting data, follow these instructions.
- Sign in to Accounting Partner Edition. The first thing you’ll see is your client list.
- Find the non-participating client in the list. If required, you can search for them by their business name.
- Click your client in the client list.
-
From the Client Sidebar click Manage > Give client access.
An Invite your client window appears.
- Check the client’s name is correct, then enter their email address twice. > Invite & Continue
The client will be sent an email to activate their account. When your client clicks on the activation link in that email, they’ll be able to choose a password and sign in.
You’ll notice in the Client Sidebar that their status shows as Awaiting Client Activation. You can still access the client’s data with this status, and you can resend the invitation if necessary.
Once the client has accepted the invitation, the status will change to My company and client both have access.