Managing users
Add users
- From the client list > Quick Actions
 > Invite a User
 - Enter the name and email for the person you want to add.
- Click Send
Your user will get an email from us which they’ll need to read. Inside the email there will be a link they’ll need to click to verify their email address. They’ll also receive information about how to get started with Accounting Partner Edition.
Note: If you receive an error message saying “the email address you entered is already linked to an existing account. please enter a different email address”, this means that the user you want to invite is already an additional user or business owner on another Sage account. To resolve this you can either use a different email address or ask the owner of the other Sage account to delete this email address from their additional users list.
Once you’ve added them, you’ll be able to change what they have access to. Take a look at the section ‘Change a user’s access’.
Resend an invite to a user
Click Settings  > User management > Click the resend button
  in the user’s row
Change a user’s access
You get to choose how much access a user has.
- Click Settings > User management > click the user from the team list > choose the user’s role.
The user’s role determines what they have access to. Each role offers a selection of predetermined access rights. Choose from one of the basic roles, or if you want finer control, choose Custom then select from any of the Access Rights.
The basic roles you can choose from are:
- Manager – Manage users and their client access.
- Advanced – Access to client data and compliance services.
- Standard – Access to basic client information.
- Custom – Create a unique role.
- No Access – Logging in is disabled.
Delete a user
You can delete pending users.
Click Settings > click the user from the team list > click Delete User from the sidebar > Delete User
Track user activity
It’s possible to track a user’s activity using Accounting Partner Edition. This option is available to the owner and any manager users.
Click Settings > User management > User activity log
The following user events are captured:
- User logged in
- User logged out
- User invited a new user
- User edited a user’s role/access
- User invited/added new client
- Client was created using mass client import tool
- A user has logged into a customer’s service
- A user has accessed a compliance application (Final Accounts, Corporation Tax) for a Client
Invite an existing user (to access Accounting Partner Edition)
It is now possible to invite an existing user of Accounting Partner Edition to access more than one subscription for Accounting Partner Edition. If, for example, you have multiple offices and have a separate instance of Accounting Partner Edition set up for each office, you can now access each of them using the same login information.
- From the client list > Quick Actions > Invite a User
-
Enter the name and email for the person you want to add.
Note: This person must already be set up as an active user for Accounting Partner Edition. - Click Send
Your user will receive an email from us. Inside the email, there will be a link they’ll need to click on to accept the invitation. It will open up this web page:
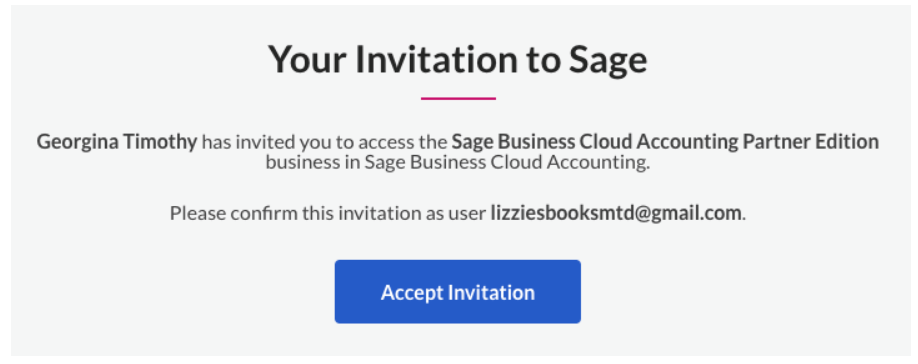
Once the user has accepted the invitation, they will be prompted to log in, and will now have access to both Accounting Partner Edition subscriptions.
Switch between two or more instances of Accounting Partner Edition
- Sign into Partner Edition.
- From the menu bar, hover over the business name to bring up the drop-down options
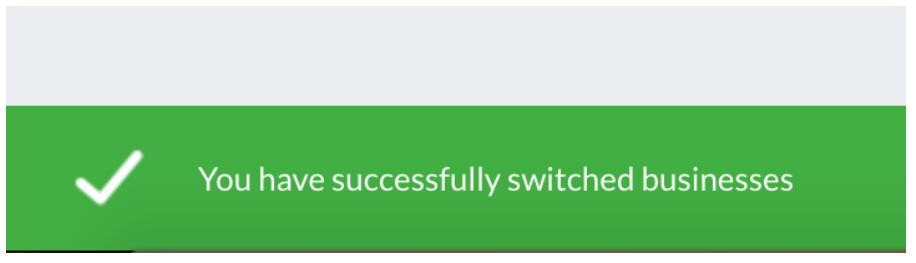
- Select another Partner Edition instance to switch to. A success banner will be displayed at the bottom of the screen confirming the successful switch.